Thursday 10 May 2018

Major Project: Project Evaluation


BOBBIE & CLIVE: PROJECT EVALUATION

I came into this unit with an idea to create a comedy about a heist. This idea started out as 'Stick-Up', a short film about two friends who decide to rob what they believe is an Apple warehouse. It turns out to be an apple (the fruit) warehouse. This is the only part of the plot that still exists in what is now 'Bobbie & Clive'.

PRE-PRODUCTION

Throughout the pre-production process my main focus was how I was going to direct the film. I wanted to fully understand my own vision for the film so I spent some time creating graphics, working on costume design, and creating mood-boards and a directors statement. All of this helped me, and others, understand my vision for the film. I wanted to make something slick and professional looking with a light-hearted tone and fun sense of humour.

Moving on from this I started working on shot lists and shooting scripts. My ideas for shots were mostly based on personal preference, but some shots stemmed from work I had seen from other directors. Location recce's and test shoots helped to inform these decisions.

Casting was an interesting process. From the get go we pretty much knew who we wanted to play the roles of 'Bobbie & Clive', and lucky for us those two people, Sophie & Nik, were happy to stay on board with us and do the roles justice. We cast Craig, who auditioned for Clive, as Frank the security guard, and looking back I am very happy with that choice. Across the weeks we rehearsed the scenes with our cast, and I believe this saved us a lot of time on the shoot days because we had already run through the blocking of each scene.

My other focus during the pre-production process was co-writing the script. Script writing has never been my strong point so I'm glad I was able to work with others on this. The story developed very a lot over the months and I'm very happy with the final script. I like the twists that were added, and I think the character development is good.

Overall the pre-production process was very long and challenging, but it set us up really well to create a great film.

PRODUCTION

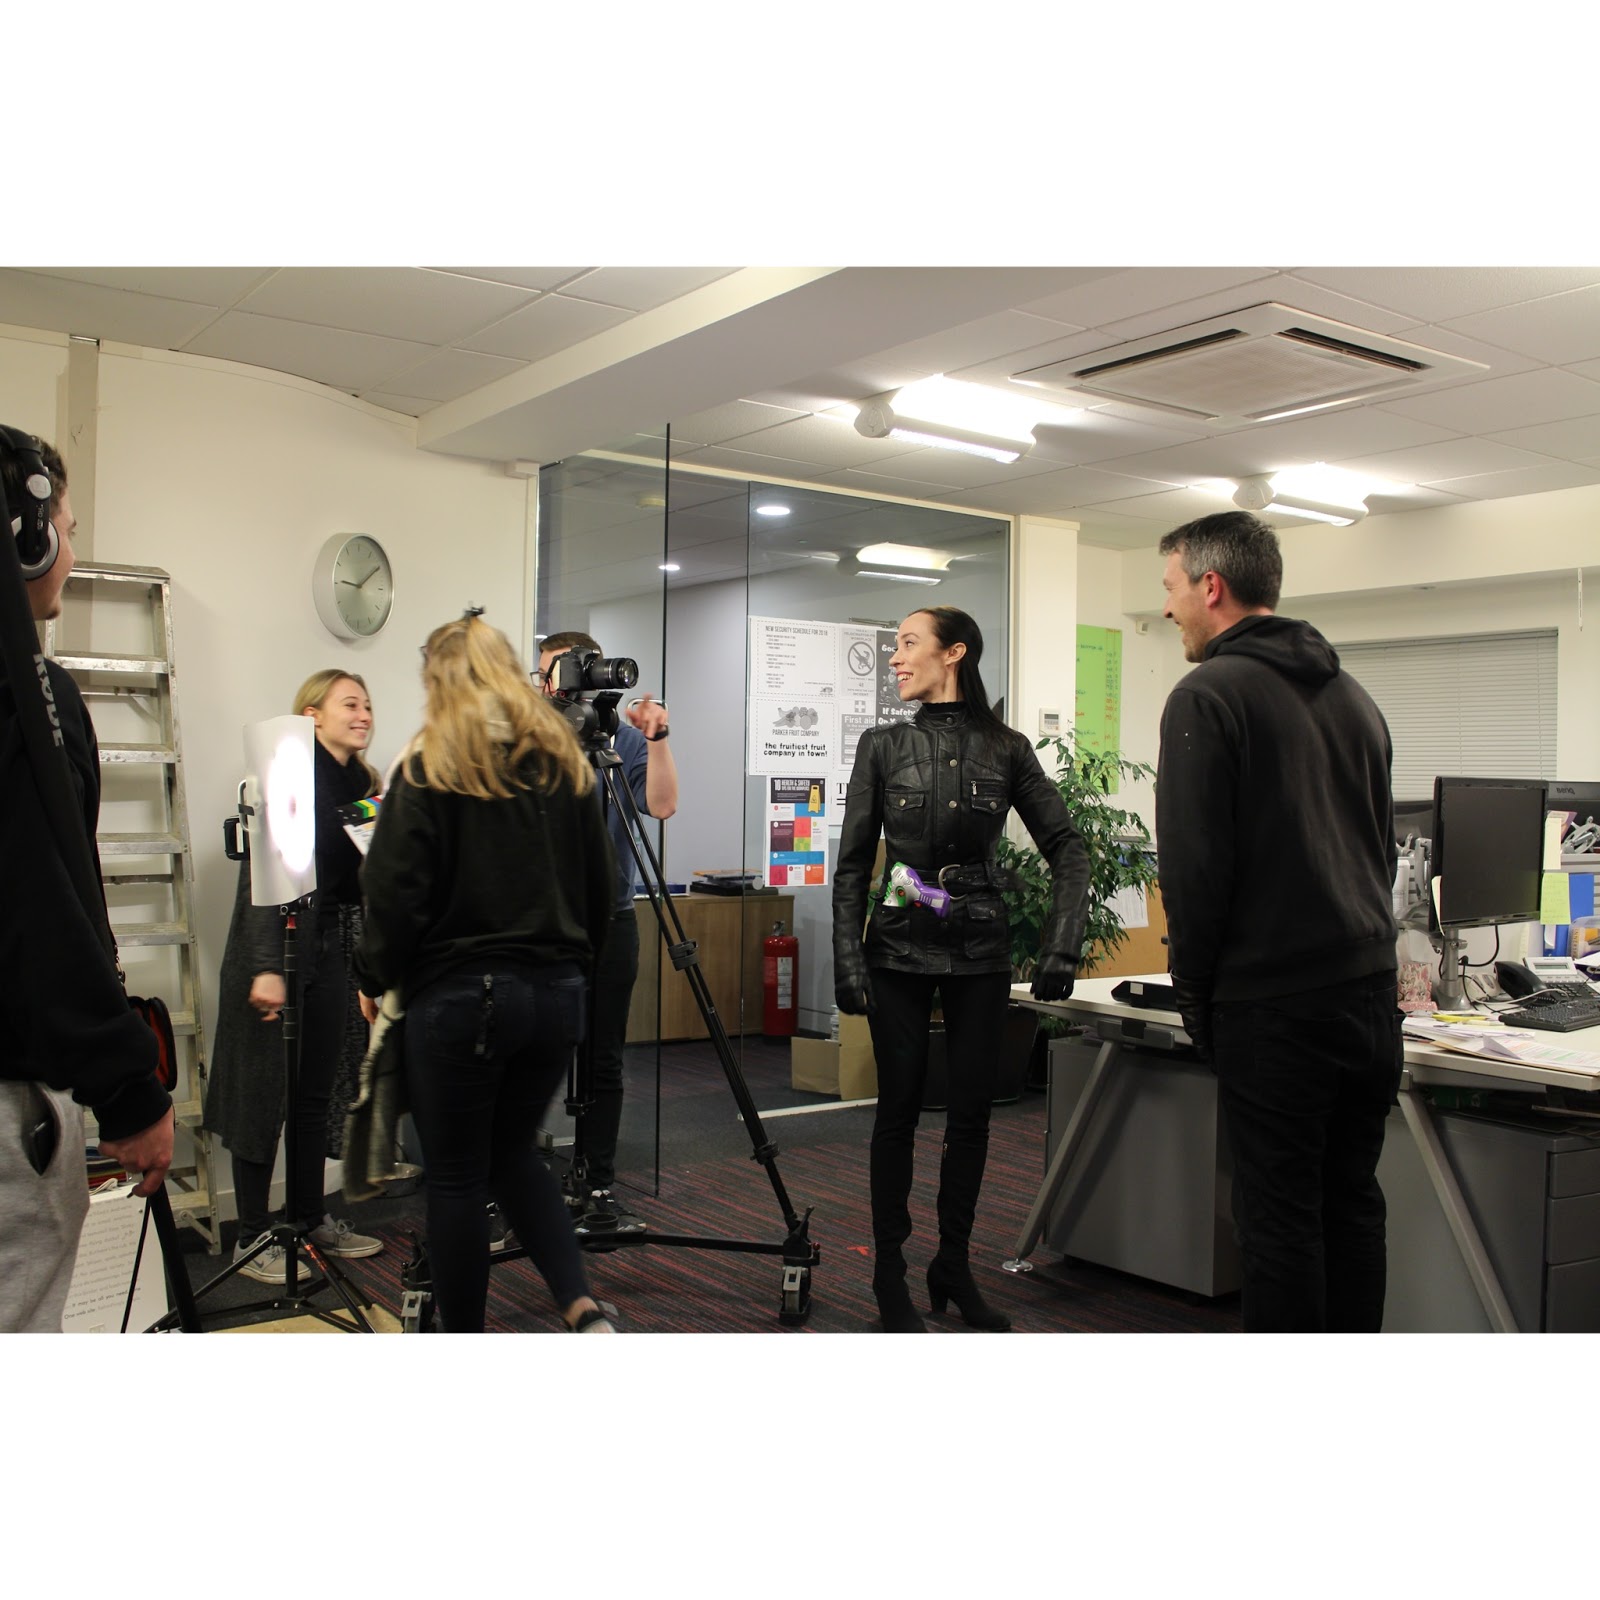
Getting to the production days was huge challenge. We were faced with extreme weather conditions and so had to reschedule. We were then faced with problems with actor availably and so had to reschedule again. Eventually we did get to the shoot day.

The three shoot days went as well as they could, especially considering that two weeks after 'the beast from the east' we were still having to deal with bad snow.

Overall I think I did a good job directing the film, both in terms of cast and crew, and I'm very happy with all of the footage and sound we captured.

More about the production days can be seen here: Day 1, Day 2, Day 3

POST-PRODUCTION

My main role during post-production was as editor. I like that I was editor & director because it meant I already had a good idea of how I wanted to cut the film together. Normally the editor would take direction from the director. On this occasion I could take direction from myself.

I structured the editing process to ensure I was always working on the film in a strategic manner. For example I started by logging and syncing all of the sound, rather than assembling the cut first. This ultimately saved me a lot of time.

I enjoyed working with Ellen on sound design and colour grade, and I think we both really understood what we wanted to achieve. When watching the film back, I am very happy with the work we carried out on this aspect. We did have some issues with the colour grade but they have now all been resolved.

Overall I found the post-production process challenging, but enjoyable, and I'm extremely pleased with the final cut of the film.

OVERALL EVALUATION: CRITICAL REFLECTIONS

Strengths-
- I believe my main strength on this project was my determination to produce an amazing film. From the get go I wanted this to be something people would enjoy and remember, and I think I have achieved that.
- I think my general filmmaking ability would a plus. I have learnt a lot during my three years on the course, and I think I literally applied everything I know during this entire production.
- I think another strength was my organisation skills. Even though I wasn't the producer, I was able to keep my involvement in the production organised and productive. I completed my tasks on time which ultimately meant we were never behind schedule.
- My final main strength on this project was my overall editing ability. I was able to edit together a very clean, professional and tight cut of the film ready for submission. I am very proud of all of the work I put into the edit, and I hope that comes across on screen. I also think my editing ability on After Effects and Photoshop really came in handy on this project as I was able to design multiple graphics for different elements of the film production.

Weaknesses-
- I still struggle to take feedback from people. On this project I decided that if I didn't agree with feedback I just wouldn't say anything because it was the easiest way to get around things. Although I see this as a weakness, I also see it as a strength. If I want to be a unique filmmaker, I need to learn to teach myself what is right and wrong with a project, not rely on others to give me their own opinion, which may not always be right.
- I feel I let myself down on the teamwork aspect of this project. Although we worked very well as a team, I know that Ellie & Ellen had to put up with some crap from me. I've had a very busy few months outside of university, and I let the stress of all of that get to me too much, which then effected the whole team. I will not let that happen again.

Possible Developments- What did I learn?
- I learnt that filmmaking is not easy and that it takes a lot of people, time, and money to create something worth watching. This is an important life lesson for me and one I will keep with me for a long time. I also learnt that at times I don't handle stress very well and I need to work on that. Most importantly I learnt that if you work with the right people, you really can create something amazing, and I think I definitely had the right people by my side throughout this project. No matter what they were always on board, and they helped me bring Bobbie & Clive to life on screen.

If I were to do this again:
- I would have done it as my pre-production unit as well so I would've had more time to prepare for it.
- I would have spent more time researching to inform my decisions. I don't know why but on this project I just chose not to do that. I wanted to do my own thing, and base my directorial decisions on my own vision not someone else's. I know it'll probably effect my final mark, but I just felt it wasn't necessary, perhaps if I did it again, I would try to research more.
- Finally I would not let stress get to me and not let it effect team morale. Although I don't think it effected the production, it still wasn't fair on everyone else.

Overall I really enjoyed working on 'Bobbie & Clive'. It's my first proper short film. I'm proud to say I co-wrote and directed it. I will be using it for years to come as a showcase of my filmmaking ability, and I'm sure Ellie and Ellen will too. Speaking of those two, they were amazing. This was my first time working with them, and I was pleasantly surprised. They were on-board throughout and had just as much passion for this project as I did. Even with everything they had to put up with from me, they were so great and I couldn't have asked for anyone better to work with on this film. I cannot wait for people to see 'Bobbie & Clive'. What a great project to finish university on!

Friday 4 May 2018

Major Project: Editing 'Bobbie & Clive'

For this project I am also the editor. I will be in charge of assembling the edit, colour correcting the footage, carrying out any visual effects work, creating the credits, and mixing the sound.

EDITING 'BOBBIE & CLIVE'

Editing this film was a very long and complicated process. This was the most time I've ever spent editing anything, and the most work I've ever put into an edit. I will try to put every detail into this blogpost, but there are a lot of fine tuning details that'll I'll probably leave out.

As I had already set up my edit and logged all of the footage, I was able to get straight on with the edit.

Syncing

Normally the first step of the editing process is to assemble all of the footage on the timeline and start cutting it together. However on this occasion I chose to sync all of my footage and sound up first, as I felt further down the line this would save me time, and it would more difficult to sync everything up once I had started cutting things down.

Premiere Pro does have a auto syncing tool but in the past it hasn't worked very well for me so I chose not to use it. To sync the sound up I created new timelines for each scene which I called scenename_SYNC  so I could identify them in my bins. 

My syncing sequences
I then added the clips first to the timeline. For each clip I zoomed in on the camera audio and found the spike created by the clapper board. I then found the corresponding audio clip and spike and then synced the clips up on the timeline using the spikes. 

Syncing using the audio spikes
For each clip I had two audio clips as we recorded using multiple mics. The first audio clip has the boom mic and Clive's mic on it, and the second audio clip has Bobbie's mic on it. Once all the audio was synced for each clip, I went back through and slit the three mic channels up onto separate timeline tracks and labelled those timeline tracks so I could easily find them. This would make the editing process easier further down the line during the sound mixing process.
Splitting the clips up into their separate channels
Once all of this was complete, the syncing process was done and I could begin to assemble the film.

Assembly

The next step of the process was to begin assembling the film. Earlier on in the process of making this film I had created a shooting script that pretty much was an edit of this film but on paper. So to assemble this film I just followed that shooting script.

I began by doing all of the smallest scenes as I knew they'd take less time, and then I worked on the longer scenes. For each edit I did a small about of sound mixing by blending the sound between clips which helps blend the edits and make them seem less obvious.

Set-up for the assembly edit
The hardest part about the assembly process was choosing which takes to use. As I'm also the director, I went through each take for each shot in each scene and made the decision as to which I thought was best. They will most likely change as the process continues.

Once I was happy with the assembly cuts of each scene I moved onto the next stage.

Fine Tuning

My next stage was fine tuning. I went back through each sequence and used the ripple delete and rolling edit tools to tighten up some of the edits I had made. This was a very quick process as I had already created quite a tight edit during the assembly process.

Sound Design and Mixing

Before doing any sound design or mixing, I first sound cancelled everything. For each clip I opened it's audio in Adobe Audition and use the noise reduction tools to remove any background noise. I found that overall this improved the entire sound edit of the film and helped blend some of the sound edits even more.

Using noise reduction in Adobe Audition
Once all the sound reduction was complete, I moved onto sound design.

An example of some of the sound design tracks
For sound design I was working with Ellen as she was the sound designer. My involvement in this part of the process was placing the sounds onto the time line where Ellen wanted them and then mixing them into the edit. The sound design mostly involved adding in atmos and foley, which really added to each scene and made it feel so much better. More information on sound design can be found on Ellens blog.

After all of the sound design was complete, I began to mix all of the sound. I was aiming to level everything out at about -12db as that is a good level for playback at a good level on most devices. To do this I used the built in audio track and clip mixing tools. I went through each scene and each individual audio clip and levelled it. I found this to be quite a long and difficult process. Trying to balance out everything, and also keep certain sound effects sounding realistic was a challenge but in the end I think I got all it to sound good and well balanced.

Editing the sound in Premiere Pro
Once I was happy with how all the sound was level, and Ellen was happy with the sound design, I moved onto the next stage of the process.

Colour Correction

As part of my role as editor I am in charge of colour correcting all of the footage so it is ready for the colour grading process. The film will be graded by the DOP Ellen. By colour correcting all of the footage, the colour grading process will be made easier because all of the footage will blend nicely pre-grade and so will hopefully blend really well post-grade too.

I used Premiere's built in colour tools to colour correct everything. I used the lumetri scopes as a reference as the two monitors I was using to edit seemed to be showing me different looks for the footage. Most of the footage was already well coloured, however scene 7 had some major issues. Most of the footage was very off in terms of white balance, and so I had to use the white balance tool to try and correct it as best as I could. This was a challenge, and I still don't think I've ever got it perfectly correct. I wish we had set the right white balance during the production days.

I slowly worked my way through each clip white balancing it, colour correcting it and trying to blend each one so the film looking consistent throughout. As I mentioned, this would make the colour grading process a lot easier.

Colour correcting in Premiere using the scopes
Colour Grading

In terms of colour grading that was Ellen's job as she is the DOP. As director I still have a small say in it, but Ellen will lead. My only involvement was finding a good preset to use as a starting point. I found a Premiere present called SL Blue Moon which is designed for Canon 7Ds. Ellen and I had previously discussed that we wanted to go for a natural look with the colour grade, but one that was more cool than warm and I felt this preset represented that quite well. Ellen agreed.

The colour grading process started with us putting the preset on top of the entire film. We then went through the edit, fine tuning the grade for each individual shot. It was a long and challenging process, but I'm happy with the final outcome. I think that starting with a present designed for the camera we used was a good idea, and it definitely saved us a lot of time, as did me colour correcting all of the footage beforehand.

Before grade and colour correction

After grade and colour correction
Visual Effects

There is one visual effects shot in this film, but it is not too obvious. During the filming process we discovered that for our final scene we couldn't actually open the storage room shutter door on for real because it was too loud and slow. So instead we filmed the shot with the door already open with a plan to edit a shutter door opening in post-production. In preparation for this, I took a picture of the door in the same lighting conditions as it would've been in the scene. I then took this picture, and the original shot into After Effects.

In After Effects I added the picture over the shot. I then cropped it and zoomed in so it would match it's positioning if it were there for real. Once this was done I used the position tools to animated the door as though it was opening. I then added motion blur to make it look more realistic. Finally I added some colouring to the door image so it would match the original shot and blend into the colour grade well.

Editing the shutter door effect in After Effects
Back in the main edit, Ellen provided me with a sound effect to put over the shot to again help sell the effect.

Finishing Touches

Now that the main bulk of the film was edited together, I began working on some of the smaller details:

- I added the Triptych animated logo to the start of the film, and mixed some of the sound design over it to blend it into the beginning of the film nicely.
- I put a letterbox on top of the entire film to give it the cinematic look we are going for.
- I added a special credits sequence I created for the film, which I have written about in a different blog post.
- And the final touch was adding the UCA end card to the end of the film.
- At this point in time I hadn't added any music.

And the film was finished. This is a run down of the edit over time. All of these processes did not take place on the first rough cut, they happened over many rough and fine cuts. Feedback over time was mostly about changing some shots around, adding and mixing some more sound design, and adding some music, which we did do for the final edit, including our custom credits track composed by Matthew J Saunders. 

Throughout the final stages the colour grade caused a few problems because the film seemed to look different on different screens. We worked very hard on fixing these issues and I believe the final version of the film, with it's colour grade, it's honestly the best we could do. If I were to colour grade a film ever again, I'd probably get a professional to do it.

Overall I am very happy with the final edit. It is a very tightly cut film with great sound design and cinematic clean visuals. The colour grade is natural and cool as intended. I really enjoyed editing this film and watching it take shape.

The final timeline for 'Bobbie & Clive'

Thursday 19 April 2018

Major Project: Poster Design

An important part of any film production is the design of the poster.

POSTER DESIGN

Having already created a logo for 'Bobbie & Clive' earlier in the process, designing a poster wasn't going to take too long because we had something to work off. I completed some research into the heist genre and their designs for posters. Here are a few examples:


They all use a mixture of the colours red, white, and black. They also all have images of the main cast on the front in action style poses. As well as this they all have distinct logos and dark tones.

The poster for the original 'Bonnie & Clyde' looks like this:


Like the others it uses the colours red, white, and black and features the main characters in an action style pose. I like the tagline "they're young... they're in love... and they kill people". I think I might adapt that and use that for 'Bobbie & Clive'. I also like how the images on the poster are painted on, instead of just being printed photographs. This was a common style around the time 'Bonnie & Clyde' was released. I would like to use that style on my poster too.

For the 'Bobbie & Clive' poster I wanted to go for something that looked similar to our logo design. I also wanted to use some of the ideas shown in other heist film poster examples, and the 'Bonnie & Clyde' poster.

After messing around a bit in photoshop, using photos from our shoot, I came up with this:


I adapted the tagline from the 'Bonnie & Clyde' by rewording it to match our film. Bobbie & Clive are middle-aged, they are married and they do need cash. It follows a similar flow to the 'Bonnie & Clyde' tagline, but matches our storyline better. I have use the colours red, white, and black as they are common in this genre of posters. The red, yellow and purple are also the colour scheme established by the logo for this film. Overall I prefer the portrait poster more.

As a group we continued to work on this poster, making small changes to the layout and animated look of the image, and eventually this was our final design:


I think this final poster design represents our film very well. It stands out which is always good for a poster, and I think it will draw people in to watching the film. It follows the genre conventions of a poster and uses the correct layout for a film poster.

Wednesday 18 April 2018

Major Project: Credits Creation

I recently saw a film called Game Night which had an interesting credits sequence that'd I'd like to replicate and adapt for 'Bobbie & Clive'.

CREDITS CREATION

In the film 'Game Night' a group of friends accidentally end up getting involved in a kidnapping when they believe is it part of a game night game. It turns out that their neighbour had set the entire thing up as a joke because he never gets invited to the game nights. The end credits sequence details this neighbours plan for this set up. It does so by showing up a series of clippings and photographs all pinned to a pin board in his basement. It's a really interesting credits sequence that draws the audiences attention and makes them stay to watch. It also represents the style of the film really well.

This inspired me to do something similar for 'Bobbie & Clive'. I wanted the credits sequence to provide the audience with the details of Clive's plan for the heist to fail. I feel this will work well because the audience don't actually what Clive did to make sure it did fail. This will give the credits sequence some purpose and will prevent it from just being another generic white text on a black screen credits sequence.

I will create this credits sequence in Affect Effects and Photoshop. The background images of the information on the pin board will be made with Photoshop, and I will animate them and add text in After Effects.

I created a visual script for the credits sequence so I could work out what visual should go with each credit. Some of the visuals link to the credit. For example, for produced by I will create an image with a schedule for Clive's plan in it, as the producer creates schedules for the film production.


My next step was to create the background images in Photoshop. I want each one to look like a series of clippings pinned on to a pin board. Below are some of the images I created.


Next I put all of the images into After Effects, added the credits text, added some small movement to each one and created this credits sequence:


Overall I really like this credits sequence. I won't say it's unique because the idea for it comes from another film, however it does make our film stand out. It's something people will hopefully remember and hopefully people won't switch off before the credits finish. This sequence will be edited into the final cut of the film.

Sunday 25 March 2018

Major Project: Production Day 3

Almost a week after production started, it was time for our third production day.

PRODUCTION DAY 3

Upon arrival we discovered that the location had changed again since out last production day. The company had moved some furniture around and we were not allowed to move it back. We quickly came up with a solution to this. All we had to do was reshoot our wide shots for scene 7, as you couldn't tell were the furniture was in our close ups and additional shots. This was not ideal as we were already behind schedule but we had no other choice.

Once this was solved we moved on to redressing the office and storage room. Unfortunately we couldn't keep everything set up during the week so we needed to do it all again. We had taken lots of pictures during the second production day so we had good references for the posters, props and boxes.

Our actors arrived on time (we had asked Sophie to come in later as we didn't need her for the start of the day), and once they had settled in I ran them through the changes to the day. We had to shoot scenes 1, 3, 4, 8, 9, 10, & 12, so we had a lot to do and not a lot of time to do it.

We began by filming the second half of scene 7 with Craig in it as Frank. I ran the actors through the scene, blocking it out with them and then rehearsing it. Once everyone was happy we began shooting the scene starting with all of the wide shots. We then moved into the close ups and additional shots. It was at this point that the actors highlighted an issue with part of the scene. I was able to resolve this issue and we carried on filming.

When we were happy with the coverage we had we continued by filming scene 9 as it takes place in the same location and uses the same two actors. Again I started by blocking through the scene with Nik and Craig and then they rehearsed it a couple of times. Once we were all happy, we began filming. During filming, Sophie arrived so Ellie went to get her ready so we could continue into scenes with her without having to pause for too long.

Once scenes 7 & 9 were wrapped, we filmed scene 8 that had all three cast members in. During the blocking it became clear that part of the scene wasn't going to work at all, so I had to come up with something else. Originally the toy laser gun was meant to fall out of Bobbie's pocket and onto the floor whilst she was hiding. We didn't have a way of doing that. It's something we forgot to plan for, but luckily we were able to come up with an alternative that still worked well for the story. Once this was sorted, we rehearsed it and carried on filming. We also made time to reshoot the wide shots for the beginning of scene 7.

After completing scenes 7, 8, & 9 the office location was wrapped and de-rigged. By doing it at this point, we saved ourselves some time at the end of the day.

We had a break and then continued filming by moving onto scene 12. This is the final scene of the film, and was the last scene we needed Craig for. As with all other scenes I began by blocking through the scenes with the actors, and then they rehearsed it. Once everyone was happy we began filming starting with the wide shots and then moving in for the close ups and additional coverage. For this scene we used George, a student on the course, for a minor character role. He did a very good job and took direction well. Whilst filming this scene we had a section where Craig had to drop a box of apples. I had the idea to shoot this part with two cameras so we could get two angles of it at the same time. This saved us having to reset the box twice as many times.

Once we'd wrapped scene 12, we sent Craig on his way and continued by filming scenes 3 & 4. Because we were running very behind, I decided to cut scene 3 down from 4 shots to one shot. We shot the scene in one shot on a stabilised camera. Fingers crossed it works out in the edit and we don't need anymore coverage for that scene. We then shot scene 4, which was a simple three camera set up so we were able to get through it quickly. Finally we shot scene 10, and all we had left was scene 1 which we could do without the actors so we saved it until last.

As we ended up saving some time filming scenes 3 & 4, we went back and reshot some stuff from scene 2, as when we reviewed the footage during the week, there were some extra angles we wanted to get.

We managed to wrap pretty much on time, but it ended up being a late finish for the crew because we had a lot of de-rigging to do. We did however save some time because we de-rigged the office earlier in the day, and whilst we were filming outside we had people de-rigging the storage room.

Overall I am happy with how the final production day went. Although we had to rush a few things, I think we still got enough coverage and good performances to fill the edit with. I'm looking forward to editing this film together, and I'm very glad the production days are out of the way.

Here are some behind the scenes photos from production day 3:


Monday 19 March 2018

Major Project: Footage Logging and Setting The Edit Up

Although we haven't finished production yet, I wanted to get an early start on logging all of the footage and sound as I know it will take a while.

FOOTAGE LOGGING

In this instance, when I say footage logging I mean watching back the footage and listening to the audio and logging everything so it's easier to sync up in post. To do this I will rename each clip using the slate information. By doing this when I'm editing I will be able to work out which clips I need to sync up just by looking at their file names.

Below is an example of what this looked like in the end:


The numbers mean:

6.9 (shot number) _6 (scene number) _1 (take number)

The sound files with the (2) are there because each take has two channels of audio in two separate files. The first is the boom mic and Clive's mic, and the second has Bobbie's mic and a blank channel. This means during the syncing process I will need to split the channels up onto three timeline tracks so I know which is which. By doing the logging now, that process will be made easier.

This was a long process, and I still have more to do after the third production day, but overall it will save me a lot of time during the editing stages of the production. Sitting and watching all of the footage and listening to all of the sound has also highlight a couple of issues, so we will need to reshoot some things on our third production day. I'm very glad I did this.

SETTING UP THE EDIT

To save myself more time in post, I have set my edit up already. This just involved configuring all of the settings, creating and organising all of my bins, and importing all of the renamed footage and audio clips that we have so far.

These are my sequence settings:


My research and own personal experience tells me these are the correct settings for our short film.

These are my bins:


I believe that by organising and setting all of this up now, as well as by logging all of the footage now, I will save a lot of time during post-production which is good as we already have less time because of shoot reschedules.

Sunday 18 March 2018

Major Project: Production Day 2

Once day one was out of the way, it was time for day two.

PRODUCTION DAY 2

Day 2 started off a little bit less stressful. The sets had already been dressed yesterday so we didn't have to worry about getting in too early to sort that out. Our plan for the day was to shoot scenes 1, 2, 3, 4, 5, & 11. Basically the only scenes we weren't going to do were the ones with the security guard in them as we're doing them next weekend on our third shoot day.

Once the actors had arrived and we had set everything up, I began blocking them through scene 5, which was a pretty simple scene I had planned to do in one shot. We rehearsed it a couple of times, and it became clear to me that one shot would not be enough coverage, so I had to come up with some additional shots there and then. I added some close ups in, as the one shot was only a wide that tracked with the action. We needed the additional shots in case we needed to speed up the pacing of the scene in post.

As we were filming the scene, our actress had to keep reseting her hair and make up in between each take as she had to take a mask off mid scene. I'm very glad that she was keeping continuity for us, however it was time consuming, so after we had finished the wide shots, we did all of the close ups with the mask already off. Hopefully this won't become an issue when we try to cut the scene together in post.

After a short break we moved onto our exterior scenes. We had to wait for it to get dark outside to do so. Unfortunately, even though we had rescheduled, we still couldn't avoid the snow. It started to snow as we were setting up. I didn't want this to effect our continuity so I decided that I didn't want to shoot any exterior shots. These were the only shots we could do that day. The rest of the cast and crew had to convince me to do it because I really didn't want to.

Eventually it did stop snowing and so we started shooting scenes 2 & 11. The two scenes take place in the same location and use the same camera positions and framing so we shot them both at the same time. It snowed on and off throughout the shoot but we had to deal with it. I ran the actors through the blocking, which didn't take too long because they were sitting in a car for the duration of the scene. Because the weather conditions kept changing I wanted to film as quickly as possible so we didn't spend a lot of time rehearsing.

As with before we started with the widest shots and then moved in for the close ups and additional coverage. Once we had finished filming those scenes, we decided to wrap. We couldn't do any other exterior scenes because the weather conditions were pretty bad, and we wanted to ensure all cast and crew could get home. We will have to make time for scenes 1, 3, & 4 next weekend.

Unfortunately the weather couldn't be helped and it really did disrupt our schedule. We are now behind schedule and will be throughout the entire third shoot day. We will have to start earlier next weekend to try and resolve this. It will be a long day.

Overall I think the day could've gone better. The weather really did screw us over. Here are some behind the scenes pictures from the day:


Saturday 17 March 2018

Major Project: Production Day 1

After multiple delays because of weather and actor availability, finally the day had come to begin shooting 'Bobbie & Clive'.

PRODUCTION DAY 1

As with all films, the first day was stressful and I felt like I had no idea what I was doing. The first few hours definitely turned me into some kind of stressed out diva. Luckily everyone could put up with that.

Upon arriving at the location we discovered that, as we had feared, they had remodelled the office by knocking down some walls. Luckily this didn't affect us too much, in fact it worked more in our favour as we now had more space to shoot scenes 7, 8, & 9. I had to adjust the blocking slightly to accommodate this new space, but it wasn't anything too major. I feel it actually worked better.

My main focus after solving this initial issue was to dress the office location. I had created some posters to stick up on the walls, and I had very specific ideas as to where I want them to all go. There were some areas were we had to stick posters up to cover up details of the company who own the office location. All our other crew focused on blacking out the windows and dressing the storage room location.

Once the office and storage room sets were dressed, our actors arrived. My main focus after they had settled in was to run them through the scenes we were going to be shooting. I ran the blocking change past them to ensure it didn't throw up any problems. We then sat down and went through any script changes and any other important information.

Our first scene that day was scene 6 that takes place in storage room. It was very cold in the room, so in between shot set ups we ensured that was a warm room for our actors to sit in. As soon as we began shooting the camera began to play up. Batteries were not lasting very long, and we believe this was due to the cold conditions. During the downtimes I used my time wisely and went through notes with the actors. This technical issue also gave me more time to run through blocking with the actors, placing marks down on the floor as we went along.

Once all the technical issues were resolved, we worked our way through the scene. I decided that we'd shoot all the wide shoots first whilst we were establishing timings for all the actions. I followed this process for every scene. We then shot all of the close ups and additional coverage.

Directing wise, I think scene 6 will be the weakest scene as it was the first scene I directed, and prior to it I hadn't directed anyone for over a year. We will probably have to do some work in the edit to improve this scene.

After a dinner break, we moved upstairs to shoot the first half of scene 7. We can't film the second half until our shoot day next week because Craig who is playing Frank is not available for our first rescheduled shoot weekend.

I started by running the cast through the new blocking. We then rehearsed it a few times, and Ellen filmed someone of the rehearsals in case we needed the footage for the film. As with before we started by shooting all of the wide shots first, and then we followed with the close ups and any additional coverage.

Once we were happy with all of the footage for this scene we wrapped for the day as it was getting quite late. We were still on schedule though. Overall I feel the day went quite well. I don't think I was prepared enough at the start. I could've directed scene 6 better. I let the stress get to me too much, and I think this will be obvious in the edit.

Below are some photos from production day 1:


Thursday 15 March 2018

Major Project: Scene Breakdown

In preparation for the shoot, I created a scene breakdown that I could refer to.

SCENE BREAKDOWN


I have chosen to create this scene breakdown so I have all of the information I need to know for each scene on me at all times during the shoot.

Each scene is broken down into:
- Scene action/description
- Character details/emotion
- Costume
- Set dressing
- Camera set up/sound set up
- Number of camera set ups
- Notes

By breaking each scene down like this, it should hopefully make it easier for us to keep track of continuity, not just visually, but also in how the cast act out their character emotions and actions.

This will also help us to plan what we are doing, as it lists the camera/sound set up, and how many camera set ups we need to do for each scene. This will help us to manage our time.

Overall it is a great reference tool for both cast and crew to use before and during each scene to ensure we all know what is going on. It will help me as a director to know where I'm at in the film, which will help ensure the actors know too, as we will not be shooting in chronological order.

Major Project: Shot List Draft 4 & Storyboard Draft 1

As we had to change the blocking of scene 6, I have created a new shot list to correspond with that. I have also created a first draft storyboard.

SHOT LIST DRAFT 4


The only change to this new shot list is the addition of a few new shots in scene 6 that correspond with the new blocking. I have added in some tracking shots that follow the characters as they walk from the new entrance to the storage room to the location of all of the boxes. I have also included a new close up that highlights Clive's look at the vehicle parked in the storage room. Everything else is still the same.

I can now use this final shot list to create a storyboard for the DOP.

STORYBOARD DRAFT 1


To create this shot list I used the 3D models of the set I had created earlier in the production. I placed cameras in the scenes and lit them like Ellen did during out test shoots. I then exported all of the images and placed them into a storyboard. I felt that by doing this Ellen would be able to better understand my framing choices, rather than looking at bad drawings, or just the shot list and blocking.

By creating a detailed storyboard, I shouldn't have to ever touch the camera to show Ellen how I want a shot to be framed. She can refer to the storyboard which hopefully is enough to demonstrate my vision for each scene. Each shot is labelled with its corresponding number on the shot list. This will hopefully make it easy to track which shots were are on during the shoot.

At the end of the process it will be interesting to see how similar the final shots are to the ones in this storyboard.

Thursday 1 March 2018

Major Project: Shoot Days Reschedule

We were due to film our major project on the 2nd, 3rd, & 4th May but unfortunately have had to reschedule.

SHOOT DAYS RESCHEDULE


Due to extreme weather conditions (ice & heavy snow), and actor availability we have had to reschedule our shoot days and push them back by about two weeks. This was not an easy decision to make but unfortunately we had too because it was not safe to shoot at our chosen location with weather like this. It was also going to cause a major continuity issue.

Our next step is to re-book equipment and Ellie will stay in contact with our cast and crew to ensure the new dates are suitable and everything is in place for us to still film on said dates. During this extra time we have we can now ensure we are super prepared for the filming days. This will allow me to do some more research and work on a good storyboard.

Wednesday 28 February 2018

Major Project: Blocking Draft 2

During our test shoot, some issues with the blocking were highlighted, so I created a new draft of the blocking sheets.

BLOCKING DRAFT 2


These are the changes made:
- On each sheet I have labelled the camera positions with the number that corresponds with the shots from that position in the shot list. This will make it easier to understand the camera positioning within the scene for each shot on the shot list. I feel this will by the DOPs life easier.
- Scene 6 has been completely re-blocked after we discovered a lighting problem with our original choice of entrance for the scene. Now the cast come through a door that doesn't reveal any day light, which is good as the film is set at night, but is being shot during the day. I feel this new blocking actually works better for the scene as Clive now walks right past the vehicle he is meant to notice. It will be right in his characters eye-line, which will work better for the scene. The geography of the scene is now much better.

This will most likely be the final blocking sheet, however things may change during the shoot days.

Monday 26 February 2018

Major Project: Triptych Logo Change & Animation

Part of this project involves coming up with a production company name to release the film under. As a group we previous came up with Triptych.

TRIPTYCH LOGO CHANGE AND ANIMATION

Upon reviewing the logo I decided I wasn't too keen on it anymore and so I created a new one.


This new logo is similar to the last one, but much lighter in colour. It uses a typewriter font because I feel this represents the writing aspect of what we've had to do much more. This is also the reason behind the crinkled paper background.

I took this logo into Adobe After Effects and animated it. I made it appear to be typed on screen with a sound effect, which I feel compliments it well. Below is the final logo animation we will be using in the film.

Saturday 24 February 2018

Major Project: Test Shoot 2

As we get closer to the shoot days, we wanted to return to the location and carry out a second test shoot.

TEST SHOOT 2

For this test shoot we wanted to:
- Test our camera choice.
- Test dressing the office and storage room locations.
- Test lighting the office and storage room locations.

We started by setting up the storage room in the way we would like to in the film. This involved putting together and stacking a lot of boxes. We know now that this takes some time, so we will ensure we have time to do it on the shoot days.

Testing the storage room set dressing
Once everything was set up Ellie & I stood in as Bobbie & Clive, and Ellen set up the camera and lighting how she wanted it. She based her camera positions and framing on my shot list and blocking. We ran through each section of the scene, testing each shot and lighting set up. Ellen kept notes so she could replicate this set up during the actual shoot.

Next we went upstairs and into the office. Whilst there we tested some of the stabilised shots I had put in the shot list. We also followed the same process as above to test some of the shots and lighting for scene 7. Ellie also tested blacking out the windows, which we found worked really well and made it look like it was night time, even though we shot all the test footage during the day.

image taken by Ellen
Below is an edit of the footage created by Ellen:


Upon reviewing the footage, I wasn't too keen on the look. It didn't have the cinematic look I was aiming for. After discussing this will Ellen, we have decided to change our camera choice. We will now be shooting the film on a Canon 7D. By using a Canon we will be able to change lenses, which will allow us to achieve different looks in camera. The depth of field we will get will help create this cinematic look I am aiming for.

After testing the Canon 7D, we decided that was definitely our final camera choice.

Thursday 22 February 2018

Major Project: Closing Credits Idea

The credits sequence of any film is very important, and so a lot of time and thought should be put into them.

CLOSING CREDITS IDEA

For this film I didn't want our credits to just be a generic white text on a black screen job. I wanted the credits to represent the style and tone of the rest of the film. I wanted them to be visually interesting so people would actually watch them.

So I went onto Adobe After Effects and messed around with a few ideas. The title card of 'Bobbie & Clive' needed to come onto screen with some impact as the end of the film is a cliffhanger that cuts straight into the credits mid-sentence. It needed to have some movement and life to it. I also wanted this to flow nicely into the credits, so I gave them some movement too.

In terms of background, font and colours, I used the same ones from my initial logo idea. And in terms of music, I used a temp track that I felt was similar to what I'd like to use in the final film.

This is what I came up with:


I feel this represents the film well, however I carried out no contextual research to get to this point, so I will do that before coming up with the final credits sequence for 'Bobbie & Clive'

Major Project: Shooting Script Draft 4, Shot List Draft 3, & Blocking Draft 1

Now our final script is complete, I have updated my shooting script & shot list, and created blocking sheets for each scene.

SHOOTING SCRIPT DRAFT 4


This will most likely be the final shooting script as the actual script won't change too much from this point. All of the shots are pretty much the same as the last draft, however they have moved around a bit to fit in with the new pacing of each scene.

I will use this new shooting script to create a new shot list draft.

SHOT LIST DRAFT 2


This new shot list is very similar to the previous draft, but has some minor changes to framing based on what I learnt in the rehearsals about the blocking in each scene. I have also thought carefully about camera placement in this shot list, and how I can captured different shots using less camera positions. For example, I can capture a wide and a close up from the same camera position.

BLOCKING DRAFT 1


I decided to block each scene using a plan view set up. I used this technique during my Breaking Bad project in the first year, and during my Fiction Adaptation project in the second year, and I found that everyone, both cast and crew, found it useful.

By blocking each scene in this manner, I can ensure that the geography of each scene makes sense, and that both cast and camera operator can see my plans for how I want to set out each scene. The blocking is based on what I have learnt from our rehearsals about how each scene works, and what I know about our location, for which I have floor plans for that I made earlier in the project.

Each scene has a page which has the blocking on it. There is a colour coded key so each person looking at the blocking, whether it be cast or crew, can see which movements and positions are theirs.

Blocking the scenes has allowed me to work out whether or now I have enough coverage, and so far I think I do. If anything changes in the blocking, I will update all other documents accordingly.

I have recently heard that our location has some remodelling work planned, so the layout of the rooms may change. If this happens, we will have to update the blocking to represent that.

Tuesday 20 February 2018

Major Project: Script Draft 11 (Final Draft)

We received some feedback on the script from our cast during the rehearsals, and so we have made some minor changes to form our final draft which is the eleventh draft.

SCRIPT DRAFT 11 (FINAL DRAFT)


Changes made to this draft include:
- In scene 5 we've added the line "it's this way come on" for Bobbie so she has a verbal way of signally Clive that they should move on. During the rehearsals we found that this section of the scene worked better with a line of dialogue rather than just a gesture.
- We've removed the line "apple the phone company" from scene 6 and replaced it with "apple not apple" as we felt this was a funnier line, and doesn't just lay out what the joke is meant to be. Saying apple the phone company was too obvious. The audience can work it out themselves.
- At the end of scene 6 Clive no longer takes a bite out of an apple. He instead picks it up, cleans it, and carefully puts it back in the box. Nik, who is playing Clive, raised the point that he wouldn't bite the apple, not if he works there and doesn't want anyone to know he tried to rob the place. He cares about the product, and treats it well.
- In scene 7 Frank now says "promotion? oh, congratulations", instead of "oh yeah I heard about your promotion, congratulations". We changed this line because during the rehearsals the point was raised that he wouldn't know about the promotion, and him finding out about it during this scene is more of an incentive for him to rob the place as payback for him loosing his own job and not getting promoted.
- The ending is still the same.

This is the final script draft and the one will we use during the shoot. As will all films things change on the shoot days when you're in the moment. I'm prepared to make changes if it is the right thing to do.

The final story outline is as follows:
- Bobbie and Clive turn up outside the building.
- Clive attempts to distract Bobbie and stop her.
- Bobbie ignores, and asks about the location. Clive assures her it's the right place.
- Bobbie then asks about the masks and finds out that Clive has brought tights with him.
- The two head over to the building, where it is revealed that Clive has brought toy laser guns with him also.
- Outside the building Clive makes one final attempt to stop this event from happening. He fails.
- They enter the building to find it empty, so they head to the storage room.
- In the storage room, Bobbie discovers they are robbing a fruit warehouse. Clive blames this on a miscommunication.
- In the office, Bobbie then discovers that this is Clive's workplace and that he has set the entire heist up to fail.
- Whilst there, Clive discovers he has been offered a promotion. They're money problems are solved.
- Then Frank the security guard turns up, and Bobbie is forced to hide whilst Clive talks his way out of the situation.
- Whilst hiding, Bobbie drops her gun, which draws the attention of Frank. She remains unseen, and Clive talks his way out of it.
- The two hear a noise coming from the storage room. This prompts Frank to ask Clive to leave, which he agrees to do.
- Clive notices that Frank is holding an apple, and so questions him on it. Frank talks his way out of it.
- Clive heads back to the car, where he finds Bobbie. He asks her about the noise she made in the storage room. She has no idea what he is talking about.
- At his point Clive pieces the puzzle together and works out what is going on.
- Bobbie & Clive go back to the storage room where they find Frank and his accomplice stealing fruit.
- The film ends on a cliffhanger.

As a group we are very happy with this final plot.